
Luau Grog
3/4 oz. fresh lime juice
3/4 oz. grapefruit juice
3/4 oz. soda water
1 oz. honey mix*
1 oz. gold Puerto Rican rum
1 oz. dark Jamaican rum
1 oz. Demerara rum
Dash of Angostura bitters
2 oz. crushed ice
Put everything into a blender saving ice for last. Blend at high speed for no more than 5 seconds. Pour into a double old-fashioned glass. Serve with ice cone.
*To make honey mix, heat one part honey and one part water until honey is thoroughly dissolved. Once cooled & bottled, it will last approx. one week in the fridge.
- From "Sippin' Safari" by Jeff Berry
I’m going to get this out of the way right up front. I made this drink because of the ice cone.
True, the recipe initially caught my eye because I’m a fan of a couple other drinks hailing from the Luau menu (those being the Jet Pilot and their version of the Scorpion). And even though the Luau Grog is an ever-so-slight reworking of a Navy Grog, I still wanted to give it a go and see what it was all about.
But really folks, it’s all about the ice cone.
After a cursory spin around some other boozeblogs, I noticed that Paul had previously tackled this very same drink, Blair had done a run-through on the Navy Grog, and Tiare had done some experimenting with various ice molds. But it seems nowhere near as many people had fiddled around with ice cones as I’d assumed. Were they that hard to make?
I’ll admit *I* was intimidated. But after a little reflection, I thought, “Hey, I hollowed out a pineapple without causing arterial spray, so how hard can it be to pack some shaved ice into a beer glass??”
What follows is my saga of ice cone creation. It’s a tale filled with joy, wonder, disappointment and self-discovery. Join me, won’t you?
I started by consulting the instructions provided in both Jeff Berry’s Sippin’ Safari and the profile piece on Berry in the May/June ‘07 issue of Imbibe (both include the recipe for the Luau Grog, and I wanted to cross-reference them for any variances).
The instructions in both sources were identical:
“For the ice cone, pack a pilsner glass with finely shaved ice, run a chopstick through the middle to make a hole for the straw, and freeze the cone overnight.”
Simple enough. I grabbed a pilsner glass, made some shaved ice, filled up the glass and made the chopstick-hole. Then into the freezer.
Here’s where things got interesting.
After a few hours in the freezer (I didn’t see the need to make it an overnight affair- my freezer is pretty robust and I figured 4 hours would be plenty of time for the cone to set up nicely.), I took out my ice-filled glasses (I made two cones), and got ready to whip up some authentic Luau Grogs.
But there was a small matter of getting the cone out of the glass. Turns out those suckers were locked into their glasses like they’d been welded there. I tried to gently rotate one of the cones to break it’s grip…to no avail. My next idea was to gingerly slip a knife between the cone and the glass and slowly work it around. I immediately broke the glass with this method. Good thing I made two cones.
With the second one, I put it under the faucet and slowly ran warm water over the outside of the glass. After a few seconds, things warmed up to the point where the cone slid free of the glass. But it came out in three separate segments that I had to thread back together with the straw…like stringing a big icy necklace. But I made the drink, put in my gimpy cone and basked in my pseudo-success.
The very next day, I had an email exchange with several other boozebloggers discussing the differences between the Navy Grog and the Luau Grog. This prompted me to look up the Navy Grog recipe in Jeff Berry’s Grog Log where I noticed something important.
Following the Navy Grog recipe, there are instructions for making the ice cone. Here they are:
“Pack ten-ounce Pilsner glass with finely shaved ice. Run a hole through center with a chopstick to make a passage for straw. Gently remove cone from glass and freeze overnight.”
It’s the first part of the last sentence that makes all the difference. REMOVE CONE FROM GLASS and freeze overnight. This step is crucial, and it’s missing from the other instructions.
Armed with my newfound knowledge I set about to make some more ice cones. But a new challenge surfaced: I remembered I had 2 different styles of pilsner glass.

I had already used the straight-sided, stemmed one (glass “A”) earlier. The other one (glass “B”) held the same amount and would produce a cone of equal height, but it would obviously differ in shape. Would it matter? Only one way to tell- I made some cones using each glass.
In a nutshell, I got nice, solid, serviceable cones from each one. Personally, I prefer the ones made with the flare-sided glass, as its flat, wider bottom results in the top of the cone having a bit more heft. It’s mainly an aesthetic concern, but the thinner, pointy top of the other cone is more likely to break off when inserting the straw or while drinking.

And it’s at this point that anyone besides the 7 other booze nerds who make up my entire readership exclaim, “Jesus Christ, I can’t believe this guy is obsessively documenting the minute differences between tiki drink ice cone shapes !!”
Guilty as charged. And it only gets worse:
In the interest of the public good, I took it upon myself to offer a step-by-step ice cone-making process that worked pretty well for me. Hopefully it’ll work for you too.
1) Make some shaved ice by whatever method you prefer. (I don’t have a fancy ice-shaving gadget, so I just pulverize the daylights out of some small ice cubes in a blender until I get a snow-like consistency.
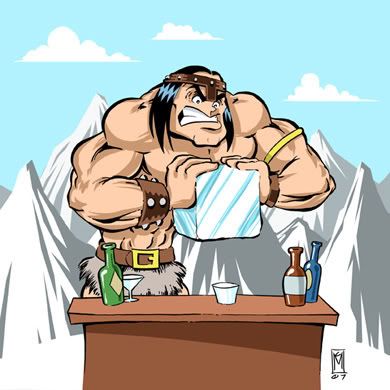
2) Pack your ice firmly into a 10-ounce pilsner glass all the way to the rim. This is the time to make sure you’re using only the finest ice bits. Allowing bigger hunks of ice into your cone will create points where it can fracture easily. I’m sure there’s technical term for this, but I’m an artist, not a Materials Science guy. I draw pictures instead:

3) In the center of the ice, push a chopstick the whole length of the glass to make your straw hole.
4) Leaving your chopstick in place, gently push down on the ice to re-pack any of it that may have gotten dislodged when making the hole.
5) Gently pull the cone from the glass (it should rotate freely and easily slide out…you can probably use the chopstick as a handle)
6) Cradling the cone gently, stand it upright in your freezer (I’d advise placing your cone on something with a smooth surface like plastic or wax paper so you can easily remove it later. (Don’t use something like a paper towel or a cloth). If you haven’t done it yet, remove the chopstick.
7) Optional Step: After the cone has been in the freezer long enough to re-harden, use a small spray bottle (Those vermouth misters and salad-oil spritzers work well) to give it a few spritzes of cold water. This will put a bit of a hard shell on the outside of the cone and help it hold together.

8) When the cone is fully frozen (a couple hours should do it, depending on your freezer), pull it out and insert the straw. You may have to gently open up the hole on one end (or both) if any of the ice shifted during all this nonsense.
9) Put it in your drink and sip away!
Speaking of the drink…
It’s pretty good. It definitely “tastes tiki”, but after having a few I couldn’t help but think it needed just a touch of something. The flavors all worked well together, but the total package seemed just a little flat & thin-tasting to me.
My remedy was to add a ¼ oz of falernum to pep it up and add a little spicy roundness. I like it much better this way.
So now that I’ve made the ice cone-crafting process sound really enticing, who’s up for making some? The first person to send me photographic evidence of their labors will, ummm…win a prize. Or maybe just my admiration. Yeah, that’s probably more likely than a prize.
UPDATE: I regretfully overlooked Mr. Bali Hai's fine efforts. See the juicy photos of his Navy Grog complete with ice cone here.